This is part of the How to Big Wall Climb SuperTopo book. Videos like the ones above illustrate key points of the book and are meant to be watched while reading the book. Buy the book here or just read this free sample of the text below with photos.
Visit on supertopo.com
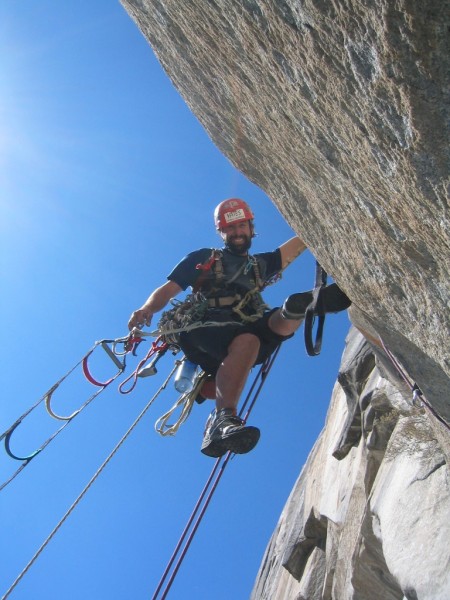 Ammon McNeely on Horse Chute, El Capitan using the Yates Speed Aider (lighter version of Yates Big Wall Ladder). Credit: Chris McNamara |
||
A Note About Links
If you are thinking about buying some of the gear mentioned in this article, we would appreciate it if you would click on one of the links before you buy. It won’t cost you anything extra, and it does help support this website. Thanks for keeping us in mind. Our affiliates are Altrec, EMS, Moosejaw, Mountain Gear, Mammoth Gear, Backcountry, Patagonia, and REI.
Click here to see what is currently on my El Capitan rack.
Basic Leading on Vertical and Overhanging Terrain
Overview
Aid climbing on vertical and overhanging terrain is much harder than on low angle terrain for two reasons:
1) It is hard to keep the weight on your feet, which means your arms do more work, you can't balance as easily, and reaching high is more of an ordeal.
2) The fifi hook and daisy chain, while sometimes necessary, create tangles, inefficient movement, and more dealing.
It is with this in mind that I made sure the first lesson in Leading 1: Low-angle Terrain did not involve daisy chains or a Fifi Hook. If you have not dialed in the skills in Leading 1: Low-angle Terrain, please stop and go back. Daisy chains are like prescription drugs: in certain key situations they can help you out. But when misused they leave you in a confused mess. The truly great old school climbers, like Tom Frost, still climb today without them.
In the first chapter on leading I didn’t mention daisy chains because it is important to first learn how to climb without them. Daisy chains have their pros and cons.
Pros:
Cons:
On a route like The Nose the cons outweight the pros; I lead with only one daisy chain or no daisy chains. On a more aid-intensive route like Zodiac, the pros outweigh the cons and I use two daisy chains.
Skills to Learn
• Aid like you free climb.
• Float up the Aiders with as few movements as possible.
• Try not to use a fifi hook. But if you do, only rest on a biner (don’t rest on a daisy).
• Always move until your waist is at the piece and efficiently maximize your reach.
• Aider management.
Essential Gear you Need to Start
Where to Practice
A vertical or overhanging wall at the climbing gym works. Alternately, a 30 to 50-foot steep cliff works well. I learned on a 20-foot-long horizontal tree branch in my back yard that worked okay.
The Basic Aid Climbing Sequence—With Fifi Hooks and Daisy Chains
Do the same sequence as you did in Leading 1: Low-angle Terrain except that now introduce the fifi hook and daisy chain.
Fifi Hook
The first step is to get the right length for the Fifi Hook, which after girth hitching to your harness (not the belay loop) is about four inches. You want to be able to barely hook the fifi on the biner connected to your Aider when standing in the third step of a standard etrier or the fourth step of the standard aid ladder. When you move up a step, your waist should be a little above the piece and the fifi short enough that it comes tight and helps pull you into the wall. You want to adjust it so you get this fit.
Video: Get the Right Length of Fifi Hook
Attaching the Daisy Chains
Girth hitch the daisy chains to the harness on either side of the belay loop and fifi hook. It is helpful to have two different colors of daisies.
You then clip the end of the daisy chain directly to a biner to the Aider.
Aid Like You Free Climb
Free climbing is much faster than aid climbing. When on a wall, you should free climb when you can. When you do need to aid climb, you should free climb as much as possible in the Aiders.
Imagine the Aiders as big footholds. Use the top of the Aider, faceholds and the crack with your hands to get as high as possible for the next placement. Use the fifi hook only when absolutely necessary for balance. Later, you’ll see more examples of this in action. Wearing tight-fitting approach shoes or loose-fitting climbing shoes makes it easy to have one foot on an Aider and one foot on a foothold to reach higher. In Leading 1: Low-angle Terrain we focused on aid climbing while using Aiders for balance when moving up. Now, feel free to use the faceholds or the crack for balance with your hands and feet.
Simplicity: As Few Movements as Possible
When you free climb simple movement comes easily. You don’t use every single foothold or handhold to make upward progress, you only use the ones that help you. Aid climbing is a little different. There are so many things to clip, ways to move up the Aider, and sequences to deal with gear. The daisy chain and fifi hook are a big part of this extra clutter and are therefore items of last resort. So before we start to use them, I want to drive home how important it is to try and not use them. Its always important to keep things as simple as possible. Here is an example of two ways to move up a piece:
At first you may be in the “lots of movement” category. But if you make an effort and want to move efficiently, you will eventually fly up the Aiders using as few movements as possible.
The Basic Aid Climbing Sequence with Fifi and Daisy Chains
1. Clip Aider directly to piece.
2. Without stopping, walk all the way until your waist is at the piece (or higher if you can).
3. If you need to do it for balance, fifi directly into the biner attached to your Aider.
4. If possible, step a step higher. The fifi should be tensioned and below your waist, which pulls you into the wall.
5. Place the next piece and attach the Aider in such a way that the daisy does not get too twisted.
6. Step into the next Aider and, if you can without using the fifi, reach over and unclip the Aider for the last piece. Clip that Aider to the side of your harness in the same place you always do (probably your belay loop).
7. Clip the rope to the last piece (unless using a fixed rope self-belay).
8. Walk up the Aider until your waist is at the next piece.
Read the rest of this chapter in the How to Big Wall Climb SuperTopo book
Visit on supertopo.com