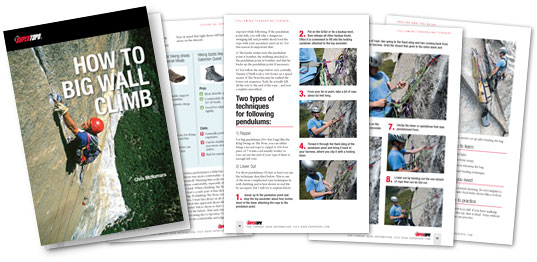
This is part of the How to Big Wall Climb SuperTopo book. Videos like the ones above illustrate key points of the book and are meant to be watched while reading the book. Buy the book here or just read this free sample of the text below with photos.
Visit on supertopo.com
Click here to see what is currently on my El Capitan rack.
Hauling, Managing the Belay, The Changeover
Hauling is the most dreaded part of wall climbing. It doesn’t have to be if you do two things:
Belay management is the easiest place to save time or blow it. What is the difference between a 5-minute belay changeover and a 20-minute changeover? About an extra day on the wall (15 minutes times 30 pitches). I'll show you how.
Travel Light
Because water is the heaviest item in the haulbag, and you can’t scrimp on it, traveling light mainly means not spending too many days on the wall. For example, if you cut your toothbrush in half, don’t bring extra t-shirts, optimize your rack, and generally shave pounds here and there, you can maybe save four pounds. If a team is able to climb a route in one fewer day you save 20 pounds! (20 = 2 pounds of food + 8 pounds of water multiplied by two people). So climbing fast is the easiest way to go light, which makes hauling easy, which makes you climb still faster while suffering less.
Dial in Your Hauling Technique
There two main techniques: space hauling and body hauling. Both techniques use the same principle: you attach yourself to the haul rope with an Ascender and then use your body as a counterweight to raise the haul bags. A hauling device (e.g. Petzl ProTraxion) has a pulley and a clamp. It is possible to haul without one of these (as I will show below) but it is much easier with one of these devices specifically made for hauling.
Skills to Learn
Gear You Need
Where to Practice
Any 30 to 100-foot cliff. If you have walking access to the top, that is ideal. Even without a cliff, you can practice/
Step-by-Step Guide to Hauling
Step 1. Choose the right bag arrangement.
On a lower-angle route like The Nose, I like to be as streamlined as possible. This means one large haul bag with as little stuff clipped outside as possible. I put the portaledge fly, poop tub etc. in the bag. If there is room I will even try to pack the portaledge in the haul bag. I do this because there is less stuff to get hung up on a roof and less stuff for the ropes to get snagged on at the belay.
On a steeper route like Zodiac it is nice to have two medium-sized bags that you haul side-by-side. This way it is easier to access stuff at hanging belays. I will often clip extra stuff to the bottom of the haul bag like a rain fly, large cams, poop tube.
Step 2. Pack the Bags
There are two key points to packing a haul bag:
1) Take off the carrying straps of the haul bag and tuck them away or put them at the bottom of the bag.
2) If you are hauling non-overhanging terrain, like The Nose, it is very important to line the bag with a foam sleeping pad or two. On an overhanging route this is less important.
3) Put all the water in the bag except for what you need that day. Two-liter soda bottles are best because they are easy to pack and don’t have edges.
4) Put all the bivvy gear and extra clothes in the bag except for the rain jacket, a warm jacket you might wear while belaying and your Headlamp-Review-Review-Review-Review—they all stay at the top.
5) Put the food in except for snacks you want to eat for lunch.
6) Settle the bag's contents. Pick it up and drop it over and over, which creates more space.
Step 3. Attach the Haul Line to the Haul Bag
You want a sturdy locking biner to attach the haul bag to the haul line.
Next, it is important to protect the knot that attaches to the haul bag by cutting the top off a plastic 1-liter or 2-liter water bottle (wide mouth water bottles are best). A keeper sling is not mandatory but nice as it keeps the knot-protector in position.
I have rarely used a hauling swivel but it is nice for a low-angle route that traverses a lot like The Nose. The swivel keep the bag(s) from spinning and getting wrapped up in the lower-outline.
Step 4. Set Up the Hauling System
Hauling With a Pulley and Ascender
I much prefer a hauling device like a Petzl ProTraxion but it is helpful to know this technique in case you drop your hauling device. Also, if you ever have to pass knots you need to know a version of this system.
1) Put the haul line through a pulley. A one-inch diameter pulley should be minimum. More than three inches is overkill unless you have massive loads to haul.
2) Clip the pulley to the master point with a locking biner.
3) Clip one Ascender to the master point with a short quickdraw.
4) Clip a backup draw into the rope (in case the pulley fails, this will catch the rope).
5) Attach an Ascender(s) to the rope, depending on which technique (see below) that you choose.
6) Ready to haul!
Hauling With a Hauling Device
The setup is the same as the pulley/Ascender technique—just more simple.
1) Put the haul line through a device and clip to the master point.
2) Clip a backup draw to the rope (in case the device fails, this will catch the rope).
3) Attach an Ascender(s) to the rope, depending on which technique (see below) that you choose.
4) Ready to haul!
Step 5. Haul the Haul Bag
Body Hauling
Body hauling is when you stay at the anchor, attach an Ascender to your belay loop, clip the Ascender to the rope, and use your body as a counterweight to the haul bag.
The key to body hauling is getting your body in the right position:
If the haul bag is really heavy, you may need to use one hand to pull up the bag.
TIP: Attach a sling to the top of the Ascender and then put it in your mouth. You use your mouth to pull the Ascender back up instead of your arm. This allows you to keep your body in a better hauling position and use both arms instead of just one to balance.
Space Hauling
Space hauling is the most efficient way to use your body as a counterweight. To do this you need two Ascenders and a hauling device like a ProTraxion.
1) When you are setting up the anchor, make sure to pull up at least 20 feet of slack before fixing the rope. This way you have a 20+ foot leash.
2) Then set up the hauling system using a hauling device.
3) Attach your Ascenders to the haul line just like you were getting ready to clean a pitch.
4) Unclip from the anchor and start walking down the wall until you get to the end of the leash.
5) Jumar back up to the anchor.
6) Repeat until the bag is up.
Warning: Space hauling is dangerous if done improperly.
Here are some things that can go wrong...
Read the rest of this chapter in the How to Big Wall Climb SuperTopo book

Visit on supertopo.com
