Article

How to Big Wall Climb: Following 1: Low Angle Terrain

Monday January 7, 2013


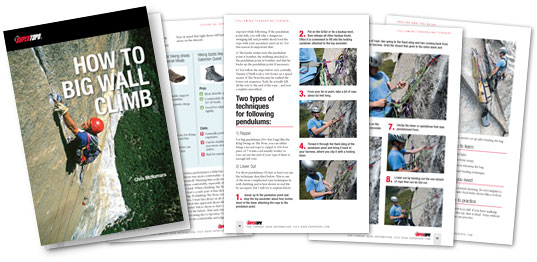
This is part of the How to Big Wall Climb SuperTopo book. Videos like the ones above illustrate key points of the book and are meant to be watched while reading the book. Buy the book here or just read this free sample of the text below with photos.

Visit on supertopo.com


top left corner top right corner
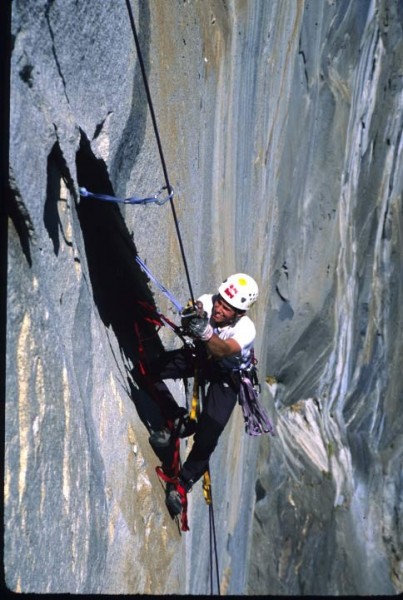
Chris McNamara jugging high on Zenyatta Mondatta, El Capitan. Long sli...
Chris McNamara jugging high on Zenyatta Mondatta, El Capitan. Long slings protect the rope from the sharp edge.
Credit: Jason "Singer" Smith
bottom left corner bottom right corner


Anchor a free-hanging rope 20 to 30 feet up. Have the rope length be at least 200 feet.


Following: The Basics
The difference between efficient and inefficient Ascender technique or “jugging” is subtle but crucial. The wrong technique burns your arms and causes bad bicep and forearm cramps. On my first one-day ascent of The Nose I used such bad technique that my arms started locking up around the Great Roof with terrible cramps. I wasn’t sure I would be able to finish the route. NOTE: For the rest of this book I use the term “jug” or “jugging” to describe ascending a fixed rope with mechanical Ascenders.

Skills to learn
 Smoothly take the Ascender on and off the rope.
 Keep you weight on your feet—not on your arms.
 “Walk up” the rope.

Gear You Need
 2 Ascenders
 2 daisy chains
 2 Aiders
 3 locking biners
 helmet
 rope
 gear for anchor
 belay device
 Optional gear: gloves, fixed-rope self belay device

Where to Practice
The same place you used for basic leading in the previous is probably best place to learn to jug. I learned to jug on a free hanging rope hung from a tree. Don’t do that! Like leading, the best place to learn to jug is on a 30 to 50-foot, 80-degree smooth wall. Eighty degrees is not only a common angle you find on big walls, it is also much much easier to learn on. If you start on overhanging terrain you will get more frustrated and develop more bad habits. If the 80-degree wall at your climbing gym has too many giant holds they will get in the way.

Tip: before you start, it’s a good idea to practice two techniques:
1- The motion of opening and closing the cam of the Ascender. Spend 10 or 15 minutes opening and closing the cam with your right and left hands. Then hang a piece of climbing rope in front of you and practice taking it on and off the rope for 10 to 15 minutes.
2 - Practice retracting the Ascender cams with your thumb to slide the Ascender up and down the rope without actually taking it off the rope.

Basic Ascender Setup
1. Attach the daisy chains to your harness.
2. Connect Aiders to locking biners.
3. Attach Ascenders to rope. If you are right-handed, the right Ascender goes on top.
4. Clip a daisy chain and Aider to the bottom Ascender (if you want extra peace of mind, use a locking biner. I don’t but I probably should.)
5. Clip a biner attached to a daisy chain and Aider to the top Ascender.
6. Figure out the right length of daisy chain for the top Ascender and clip the daisy chain directly into the locking biner and lock the gate.

Key point: Get the top daisy length right. If the daisy connected to the top Ascender is too long, you will put too much weight on your arms. If too short, you will make ascending motions that are too short and inefficient. The way to know that you have the right length is when you hang with all your weight on the daisy chain, your arm comfortably holds the Ascender with a small bend. (TK Show three photos: good, daisy too short, daisy too long)

If you just have one daisy chain, use it to attach yourself to the top Ascender. Use two intertwined shoulder-length runners to connect to the bottom Ascender.

If you don’t have any daisy chains, use one shoulder-length runner to attach yourself to the top Ascender. Use two intertwined shoulder-length runners to connect to the bottom Ascender.

Video: Ascender Set Up

Two Ascending Techniques, One Principle
The two ascending techniques depend on whether a) The wall is vertical or overhanging, or b) The wall is less than vertical. In either case, the most important thing is to keep as much weight as possible on your legs and as little weight on your arms. In this chapter we cover less than vertical terrain. In the next ascending chapter we cover vertical and overhanging terrain.

A. Less Than Vertical Wall (slabby wall)
1. With your feet out of the Aiders, pull the slack out of the rope by alternately sliding the Ascenders up the rope.

2. If you are right-handed (right Ascender on top) you put your left foot in the third step of an aid ladder or the second step of a standard Aider. Push the right Ascender as high as you can, then put your right foot in the fourth step of an aid ladder or the third step of a standard Aider. Note 1: If you are left-handed, reverse this. Note 2: If you are taller than six feet, you might need to put your feet lower.

3. Once you have pushed the top Ascender as high as it will go, shift your weight onto the Aider connect to the top Ascender. Ease your weight off the Aider connected to the bottom Ascender and slide up the Ascender.

4. Repeat. At first it is tricky to coordinate the weight shifting. But in a short time it will start to flow.

Key Tip
 The most important point: Unlike overhanging jumaring where you have to use both your arms and legs, on less-than-vertical jumaring you should have all your weight on your legs. Your arms are only there to move the Ascenders up—never to rest on. The best way to do this is lean into the rock as much as possible. On just under vertical terrain, you will need to nearly touch your nose to the rope in order to keep your weight totally on your feet and not on your arms.

Two common frustrations when learning
 When leaving the ground or a belay, if there is not much rope below you, the bottom Ascender won’t slide up on its own. You have to manually open the cam a little with your hand. At first this is annoying and awkward and you will be tempted to take you hand off the top Ascender and use it to tension the rope below the bottom Ascender. This works but is inefficient. It is better to get good at manipulating the cam with your hand so that it slides up and down. See the tip at the beginning of the chapter.

 At first your feet will come out of the Aiders. This is normal. Over time you will get better at maintaining the right pressure between you feet and the Aiders so that they stay in. I never use elastic or anything else to keep my feet in the Aiders because it ends up taking more time than it saves. And often you want to be able to get your feet out of the Aiders fast.

Read the rest of this chapter in the How to Big Wall Climb SuperTopo book


Visit on supertopo.com
  Article Views: 29,853
Chris McNamara
About the Author
Climbing Magazine once computed that three percent of Chris McNamara’s life on earth has been spent on the face of El Capitan—an accomplishment that has left friends and family pondering Chris’ sanity. He’s climbed El Capitan over 70 times and holds nine big wall speed climbing records. In 1998 Chris did the first Girdle Traverse of El Capitan, an epic 75-pitch route that begs the question, “Why?”

Outside Magazine has called Chris one of “the world’s finest aid climbers.” He’s the winner of the 1999 Bates Award from the American Alpine Club and founder of the American Safe Climbing Association, a nonprofit group that has replaced over 5000 dangerous anchor bolts. He is a graduate of UC Berkeley and serves on the board of the ASCA, and Rowell Legacy Committee. He has a rarely updated adventure journal, maintains BASEjumpingmovies.com, and also runs a Lake Tahoe home rental business.

Lambone

Big Wall climber
Ashland, Or
  Oct 28, 2008 - 05:36pm PT
Chris,

One thing I'd mention in setting up for cleaning is that if the pitch traverses left, put the left jug on top and vise-versa.

In Sloan's lowering out video I usually elimninate the extra step of clipping one aider and fifi-ing directly into the piece before putting the bight through. Seems like an extra step, unless you cant cram the bight through the tie-off.

I find the "Texas" style method to be the easiest when jugging overhanging fixed lines....

Perhaps mention carrying the rope bucket on your harness to stack the rope into as you ascend. I do this if it's windy enough.
Andrew Barnes

Ice climber
Albany, NY
  Nov 4, 2008 - 11:22pm PT
Chris,
This is great stuff, very lucid and clear.
There is one suggestion I would make regarding cleaning an
overhanging or traversing pitch (which is not dead horizontal).
It is very annoying to get a jumar stuck in the piece to be
cleaned. Imagine that I pass the upper jumar over the piece
and then the lower jumar gets sucked into the piece as soon as
I weight the upper jumar. My strategy for dealing with this is
to keep the lower jumar low (at least a couple of feet below
the piece), but step up very high in my aider (clipped to the
lower jumar) and then clip the upper jumar over the piece (as
high as possible).
This usually gives me enough slack to unclip the rope from
the piece and clean it (unless my partner has really hosed me
with aggressive backcleaning and super long reaches on the
traverse or overhang). Sometimes it is necessary to do a short
lower out, if there is a fixed piece to lower from.

I didn't learn this simple point about not getting the jumar
stuck in the piece, until a partner explained it to me while
I was cleaning pitch 5 of Tangerine Trip. On that wall, I had
to use the overhanging cleaning technique for every pitch,
except the last one.

Andrew Barnes.
Chris McNamara

SuperTopo staff member
Author's Reply  Jan 27, 2009 - 09:13pm PT
Erik Sloan just posted a higher res version of his "How to lower out" movie here http://www.vimeo.com/2799513

john hansen

climber
  Jan 27, 2009 - 10:55pm PT
Great stuff Chris, watched five or six of your vidio's.

Very informative.

Just a couple years ago I saw those 'ladder' aiders in the climbing store in Yosomite. How long are those things anyway?
I think the one I saw had 6 steps,,


Captain...or Skully

climber
Boise, ID
  Jan 27, 2009 - 10:56pm PT
5 or 6 is perfect
dougs510

Social climber
down south
  Jan 27, 2009 - 11:54pm PT
bump
hossjulia

Trad climber
Carson City, NV
  Jan 28, 2009 - 06:11pm PT
Chris this is great stuff, thanks!
I have the stuff to practice with, including some nice south facing large boulders around my place. And big trees. :)
The video how-to's are cool.

dougs510

Social climber
down south
  Jan 28, 2009 - 07:14pm PT
Watched the video Chris. Good stuff for sure. Much more informative than pictures. I like the idea of having video. Is this going to be an online type book? I remember back in the day, I used to download the topos and print them out. Those were good times!
John Mac

Trad climber
Breckenridge, CO
  Jan 29, 2009 - 11:00pm PT
Chris,

I finally found the time to read this and watch all the videos. Fantastic effort, keep it coming. Looking forward to buying your book when it comes out. This is a great thread.

Cheers

john

PS: I'm seriously considering buying a set of Yates ladders and giving them another go. (Going from two pair of traditional aiders to 2 ladders)
Chris McNamara

SuperTopo staff member
Author's Reply  May 6, 2009 - 12:30pm PT
Nanook just made a great new video on how to lower out. check it out http://vimeo.com/4388859
John Mac

Trad climber
Breckenridge, CO
  May 6, 2009 - 12:49pm PT
My two aider experience ....

http://www.mountainproject.com/v/big_wall_and_aid_climbing/two_aider_experience/106421587

Thorgon

Big Wall climber
Sedro Woolley, WA
  Jun 13, 2009 - 01:29pm PT
Ammon made this short video clip of "cleaning with a Grigri" that I can not find, anyone have the link, it was extremely concise and to the point!

At least I think it was Ammon?


Lost in cyberspace.
Thor
GDavis

Social climber
SOL CAL
  Jun 13, 2009 - 02:27pm PT
It would be cool to include a video with the DVD and in sections in the book have "Refer to the Cleaning chapter." Kind of like a create your own adventure/read along thing. A-hyuck. Still, good idea...
10b4me

Social climber
Lida Junction
  Mar 13, 2014 - 12:15am PT
Bump
Go
Related Guidebooks
Related Climbing Routes
El Capitan - The Nose 5.14a or 5.9 C2 - Yosemite Valley, California USA. Click for details.
The Nose, 5.14a or 5.9 C2
El Capitan
  • 1
  • 2
  • 3
  • 4
  • 5

The Nose—the best rock climb in the world!
Washington Column - South Face C1 5.8 - Yosemite Valley, California USA. Click for details.
South Face, C1 5.8
Washington Column
  • 1
  • 2
  • 3
  • 4
  • 5

The South Face of Washington Column.