| Route Name |
Formation |
Climbing Area |
|
|
Review |
|
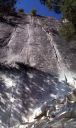
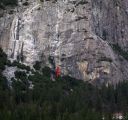
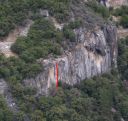
| Bummer
5.10c, Sunnyside Bench
Bummer the line on the left.
Photo:Chris McNamara |
|
Sunnyside Bench |
Yosemite Valley, California USA |
2 |
5.10c |
|
|
|
Lower Cathedral Rock |
Yosemite Valley, California USA |
1 |
5.10c |
|
|
| Bijou
5.10c, Five and Dime Cliff
Photo:Chris McNamara |
|
Five and Dime Cliff |
Yosemite Valley, California USA |
1 |
5.10c |
|
|
|
Arch Rock |
Yosemite Valley, California USA |
2 |
5.10c |
|
|
|
Lower Cathedral Rock |
Yosemite Valley, California USA |
1 |
5.10c |
|
|
|
Lower Cathedral Rock |
Yosemite Valley, California USA |
2 |
5.10c |
|
|
|
Schultz's Ridge |
Yosemite Valley, California USA |
1 |
5.10c |
|
|
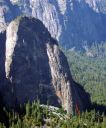
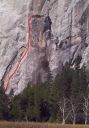
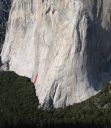
| West Face
5.10c, Rixon's Pinnacle
The line of ascent.
Photo:Todd Snyder |
|
Rixon's Pinnacle |
Yosemite Valley, California USA |
5 |
5.10c |
|
|
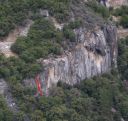
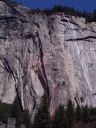
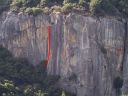
| Serenity Crack
5.10d, Royal Arches Area
Serenity Crack follows elegant line up horrible pin scars.
Photo:Todd Snyder |
|
Royal Arches Area |
Yosemite Valley, California USA |
3 |
5.10d |
|
|
|
North Dome |
Yosemite Valley, California USA |
5 |
5.10d |
|
|
|
Five and Dime Cliff |
Yosemite Valley, California USA |
1 |
5.10d |
|
|
|
El Capitan |
Yosemite Valley, California USA |
1 |
5.10d |
|
|
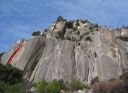
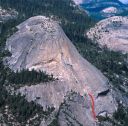
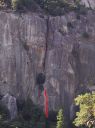
| Lazy Bum
5.10d, Sunnyside Bench
Lazy Bum the line on the center.
Photo:Chris McNamara |
|
Sunnyside Bench |
Yosemite Valley, California USA |
1 |
5.10d |
|
|
|
The Cookie Cliff |
Yosemite Valley, California USA |
2 |
5.10d |
|
|
| Catchy
5.10d, The Cookie Cliff
Photo:Todd Snyder |
|
The Cookie Cliff |
Yosemite Valley, California USA |
1 |
5.10d |
|
|
|